How to Apply a Tourniquet: Step-by-Step Field Guide for Life-Threatening Bleeding
Last updated: October 9, 2026 · Originally published September 25, 2026
Severe limb bleeding kills in minutes, and a tourniquet applied correctly in those first minutes is what changes the outcome.
Severe limb bleeding kills in minutes. A tourniquet applied correctly within the first few minutes of a traumatic injury stops that bleeding and buys time for evacuation and definitive medical care. The technique is simple, but only if you’ve practiced it before the emergency. Reading about it afterward is too late.
This guide covers how to apply a tourniquet correctly — the step-by-step process, the anatomy of proper placement, how to know when a tourniquet is working, and what to do after it’s applied. It includes guidance on the CAT (Combat Application Tourniquet) and SOFTT-W, the two most field-validated designs available. For a complete trauma response foundation, pair this with the 72-hour emergency kit guide and the best emergency food storage guide — a complete preparedness kit includes trauma capability alongside shelter and food.
When to Apply a Tourniquet
Life-Threatening Limb Bleeding: The Only Indication
A tourniquet is a tool for one specific problem: life-threatening hemorrhage from a limb — arm or leg — that cannot be controlled by direct pressure alone. The indicators that tell you a tourniquet is necessary: blood is soaking through bandages despite firm direct pressure, blood is pooling rapidly and the person shows signs of shock (pale skin, rapid weak pulse, confusion), or the wound involves arterial bleeding — pulsing or spurting bright red blood rather than steady dark red flow.
Arterial bleeding from major limb vessels — the femoral artery in the thigh, the brachial artery in the upper arm — can cause death from blood loss within 3–5 minutes. At this rate, direct pressure alone is often insufficient, and the time to get it right is measured in seconds.
Situations Where Tourniquets Apply in the Field
For hunters, outdoorsmen, and anyone working in remote environments, the most common tourniquet scenarios are: chain saw or ax wounds with deep limb lacerations, hunting accidents involving firearms, vehicle accidents in remote areas, and severe lacerations from falls on rocky terrain. In any of these situations where evacuation is more than a few minutes away and bleeding is severe, a tourniquet is the correct intervention — not a last resort, but the right tool applied early.


Tourniquet Anatomy: Know What You’re Working With
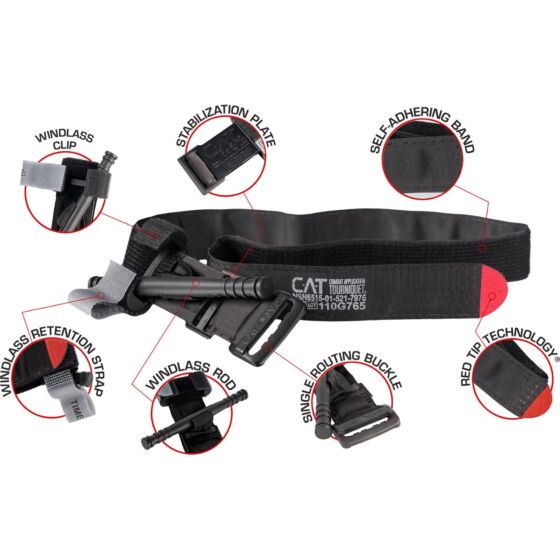
CAT (Combat Application Tourniquet) — Generation 7
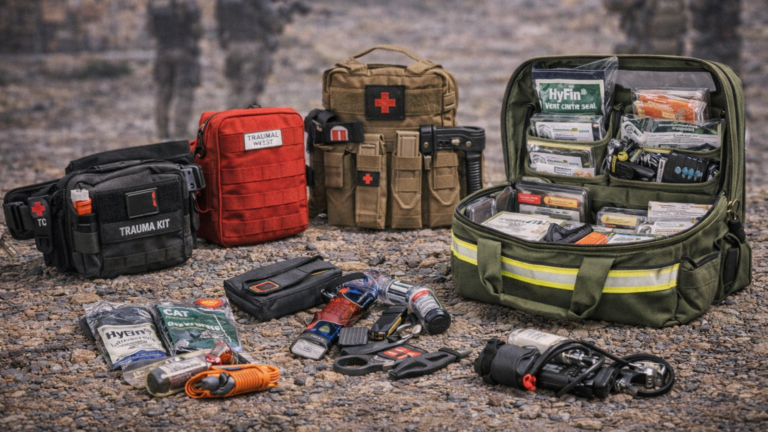
The CAT is the most widely issued and validated tourniquet in military and civilian emergency medicine. Its design consists of a single-band strap, a friction adaptor buckle for initial tightening, and a windlass rod that twists the strap tight when direct buckle tightening is insufficient. A securing clip holds the windlass in place, and a time label strip records application time. The CAT Gen 7 is the version currently issued by the U.S. military and recommended by Stop the Bleed and the American College of Surgeons.
Key CAT components to know before application: the friction adaptor buckle (threaded — pull the tail through and back for self-application), the windlass rod (the plastic stick that you twist), the securing clip (clips over the windlass after tightening), and the time label (write the application time in permanent marker immediately after securing).
SOFTT-W (Special Operations Forces Tactical Tourniquet-Wide)
The SOFTT-W uses a wider band (1.5 inches vs. CAT’s 1.5 inches, similar width but different construction) and a tri-ring buckle rather than a friction adaptor. It is slightly more effective at distributing pressure across the limb and is preferred by some practitioners for thigh applications. The windlass mechanism is identical in concept to the CAT. Either device, properly applied, achieves equivalent outcomes — the CAT’s wider availability and simpler self-application buckle system make it the more practical choice for non-military users.
How to Apply a Tourniquet: Step-by-Step
Step 1: Make the Decision and Call It Early
The single most important teaching point in modern tourniquet training: apply it early, not as a last resort after repeated pressure attempts fail. Studies from military combat trauma show that early tourniquet application — before significant blood loss has occurred — produces dramatically better outcomes than late application after the patient is already in hemorrhagic shock. If the bleeding is severe and the limb is involved, the decision should be made in the first 30 seconds.
Step 2: Expose the Wound
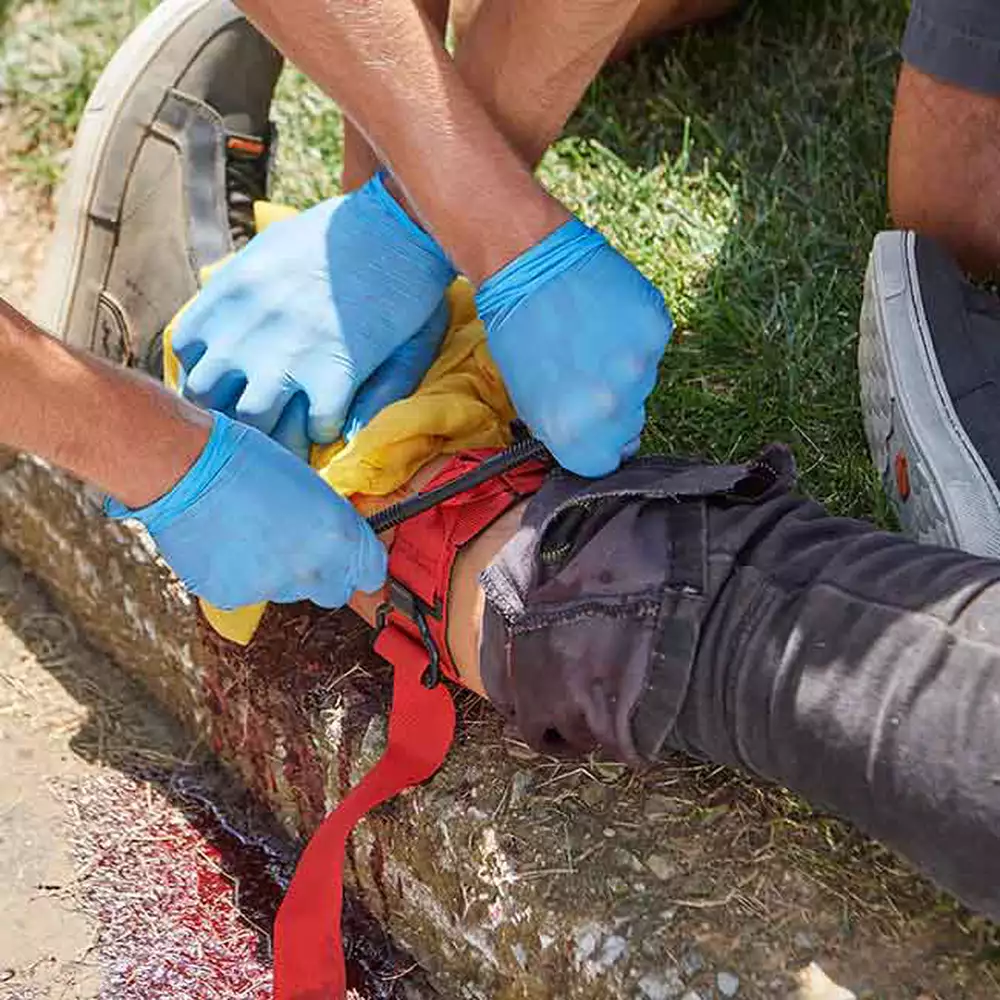
Cut or remove clothing over the wound and above it. The tourniquet must be applied to bare skin or a single thin layer of clothing — never over thick fabric, pockets, or seams, which prevent the band from transmitting pressure to the underlying vessels. Use trauma shears or a knife. Speed matters — don’t wrestle with buttons or zippers.
Step 3: Position the Tourniquet 2–3 Inches Above the Wound
Place the tourniquet 2–3 inches (5–7 cm) proximal to (above, toward the body from) the wound. Proximal means between the wound and the heart — for a leg wound, above the wound toward the groin; for an arm wound, above the wound toward the shoulder. This positions the tourniquet over the major vessel supplying blood to the wound area.
Do not place the tourniquet over a joint — knees, elbows, and other joints prevent the band from cinching properly. If the wound is close to a joint, place the tourniquet above the joint. For junctional wounds (groin, armpit, neck, pelvis) where tourniquet placement is not possible, a wound packing technique with hemostatic gauze is the correct intervention, not a tourniquet.
Step 4: Thread and Tighten the Band
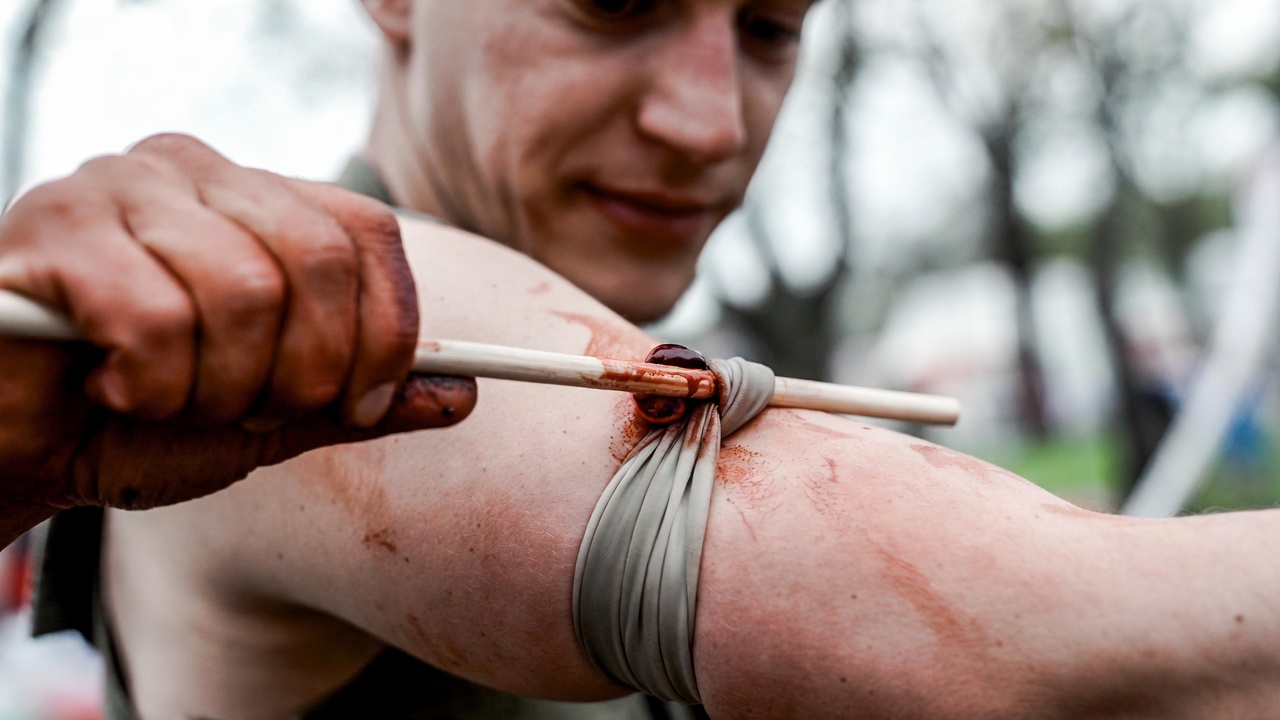
For the CAT: pass the strap through the friction adaptor buckle, wrap around the limb, and feed the tail back through the buckle in the opposite direction (creating a loop the buckle locks against). Pull the tail firmly to tighten — this is the first stage of tightening. Pull until snug against the skin, then pull harder. The goal is to have the strap tight before you reach for the windlass.
For self-application (one hand): hook the loop of the strap over the limb and use your teeth or the friction buckle to start tightening. Practice this before you need it — one-handed self-application on a leg is significantly harder than two-handed buddy application and requires deliberate practice to execute reliably.
Step 5: Twist the Windlass Until Bleeding Stops
Grasp the windlass rod and rotate it. Each full turn increases pressure on the limb. Continue rotating until the bleeding stops — this is the goal, not a specific number of twists. Most applications require 3–6 full rotations, but the correct number is whatever stops the bleeding. Do not stop rotating because it’s painful — tourniquet application is extremely painful and this is unavoidable. Stop when the bleeding stops.
The sign that the tourniquet is working: the wound stops bleeding, and (if checking a pulse distal to the tourniquet, meaning below it toward the hand or foot) the pulse disappears. A distal pulse that remains present after tourniquet application indicates insufficient pressure — continue tightening. In the field without pulse oximetry, confirm by watching the wound: active bleeding that stops is the confirmation.
Step 6: Secure the Windlass
Once the windlass is tight enough to stop bleeding, lock it in place using the securing clip on the CAT. The clip folds over the windlass and clips to the strap, preventing the windlass from unwinding. This step is critical — an unsecured windlass can unwind spontaneously during transport, releasing pressure and resuming hemorrhage. Verify the clip is fully engaged.
Step 7: Record the Time
Write the time of tourniquet application on the time label in permanent marker — or on the patient’s forehead if you don’t have a marker. This information is critical for the receiving medical team: tourniquet time determines the safe window for removal (generally 2 hours before limb ischemia becomes a serious concern) and tells surgeons what they’re dealing with. If you don’t have a pen, tell every person involved in the evacuation the time.
Mark on the label: “TK” (tourniquet) and the time applied. Emergency medical personnel are trained to look for this marking.
After Application: Monitoring and Transport
Check Every 5–10 Minutes
After application, reassess the wound every 5–10 minutes during transport. The specific checks: is the wound still bleeding? If yes, either the tourniquet has loosened or the pressure is insufficient — tighten the windlass further or apply a second tourniquet 2–3 inches proximal to the first. Is the patient showing signs of shock (rapid breathing, pale or gray skin, decreasing consciousness)? If yes, lay them flat, keep them warm, and continue evacuation.
Do Not Remove the Tourniquet in the Field
Once applied, do not remove or loosen a tourniquet in the field. The historical practice of periodically releasing tourniquet pressure to restore circulation has been definitively abandoned — it increases blood loss and worsens outcomes without meaningful benefit to limb survival. The tourniquet stays in place until the patient reaches definitive surgical care. Removal is a medical decision made in a clinical environment with blood products and surgical capability available.
Hypothermia Prevention
Severe bleeding causes rapid heat loss. After controlling hemorrhage, prevent hypothermia actively — remove wet clothing if possible, cover with emergency blankets, and keep the patient off cold ground. A patient who has lost significant blood is at high risk for the “trauma triad of death”: hypothermia, acidosis, and coagulopathy (inability to clot). Keeping the patient warm is a meaningful intervention, not a comfort measure.
Common Application Errors
Applied Too Loosely
The most common error in tourniquet application is insufficient tightening. A tourniquet that is snug but not tight enough to stop arterial bleeding creates a dangerous situation: venous blood continues to leave the limb (veins compressed) but arterial blood continues to enter (arteries not compressed), increasing blood loss rather than stopping it. Tighten until bleeding stops and the distal pulse is absent, regardless of the patient’s pain response.
Applied Over Clothing or in Wrong Location
Thick fabric, pockets, and seams prevent the band from transmitting pressure efficiently to the underlying vessels. Always apply to bare skin or a single thin layer. Application over a joint (knee, elbow) prevents the band from cinching around the limb correctly — go above the joint.
Windlass Not Secured
An unsecured windlass that unwinds during transport resumes hemorrhage without warning. Confirm the securing clip is fully engaged after locking the windlass, and visually recheck it every time you handle or move the patient.
Time Not Recorded
Medical teams receiving the patient need to know when the tourniquet was applied. No written time means the receiving team must estimate or assume worst-case, which affects surgical decisions. Always record the time, even if you have to write it on skin with a fingernail scratch in the absence of a marker.
Tourniquet Training and Practice
Why Practice Matters
A tourniquet you haven’t practiced with in advance will take 3–4 times longer to apply under stress than one you’ve applied dozens of times in practice. Under the physiological stress of an emergency — elevated heart rate, adrenaline, potentially your own blood — fine motor skills degrade significantly. The application sequence must be automatic, not recalled from a written guide. Stop the Bleed (stopthebleed.org) offers free hands-on training through locations nationwide and is the recommended starting point for anyone who carries a tourniquet.
Practice Drills
The key drills to practice before carrying a tourniquet: apply a CAT to your own thigh in under 60 seconds using one hand; apply a CAT to a partner’s arm in under 30 seconds; apply in low-light conditions (headlamp only); apply with gloves on; and verbally walk through each step without touching the device. These drills take 30–60 minutes to run through completely and should be repeated every 6 months to maintain proficiency.
Frequently Asked Questions About Tourniquet Application
How tight should a tourniquet be?
Tight enough to stop bleeding and eliminate the distal pulse — that is the correct standard. There is no fixed number of windlass turns or a specific pressure target. Continue tightening until the wound stops bleeding actively. Tourniquet application is painful; the patient’s pain response is not an indicator of proper tightening. A tourniquet that hurts but hasn’t stopped the bleeding is not tight enough. Most applications require 3–6 windlass rotations, but the confirmation is cessation of bleeding, not the number of turns.
How long can a tourniquet stay on before causing permanent damage?
The widely cited guideline is 2 hours as the safe window before significant ischemia risk to the limb, but this is a planning guideline, not a hard cutoff. Military data shows functional limb survival after tourniquet times exceeding 4 hours in many cases, particularly in younger patients with good vascular health. The critical point is that the risk of death from uncontrolled hemorrhage far outweighs the risk of limb damage from tourniquet ischemia in any realistic emergency scenario. Apply it when bleeding is life-threatening, record the time, and get the patient to surgical care as fast as possible.
Can you apply a tourniquet to your own leg?
Yes, but it requires deliberate practice in advance. Self-application to the thigh is the most difficult one-handed scenario: you must thread the strap, tighten it, and rotate the windlass with one hand while potentially already in shock from blood loss. The CAT’s friction adaptor buckle is better suited to self-application than the SOFTT-W’s tri-ring buckle. Practice self-application specifically — not just buddy application — if you carry a tourniquet for solo activities like hunting, backpacking, or working remote. The drill: set a timer, apply to your own thigh using only your non-dominant hand, and achieve a properly secured, bleeding-stopping application under 90 seconds.
Published by Chad Dyer, President, Brand Avalanche Media, Inc. Popular Outdoorsman is an independent editorial publication. This guide provides educational information. Seek formal Stop the Bleed or wilderness first aid training for hands-on practice with certified instructors.


Reader Favorites
Field-to-table reference desk
From tag to table — official season dates for all 50 states, plus safe doneness temps for your harvest.
| Species | Archery | Firearm |
|---|---|---|
| Deer | Sep–Oct | Nov |
| Elk | Sep | Oct–Nov |
| Turkey | — | Apr–May |
All 50 state wildlife agencies, plus how seasons, tags and licenses work.
Find your state → Network| Doneness | Target |
|---|---|
| Rare | 125–130°F |
| Medium-rare | 130–135°F |
| Well-done | 160°F+ |
Safe pull temps for venison and steak, from Popular BBQ.
View full chart →