How to Start a Fire Without Matches: Proven Methods That Work
Last updated: October 9, 2026 · Originally published September 22, 2026
Matches fail and lighters run dry, so these are the fire-starting methods that still work without either, in the order worth learning them.
Matches fail. Lighters run out of fuel. In any genuine survival situation — a wet camping trip gone sideways, a winter breakdown, or a long-term emergency — the ability to start a fire without modern ignition tools is a foundational skill. Every other fire-starting tool should be a backup to a skill, not the other way around.
This guide covers every viable method for starting a fire without matches or a lighter: friction-based methods, spark-based methods, solar methods, and chemical ignition. More importantly, it covers the supporting skills — tinder preparation, fuel progression, and troubleshooting — that make the difference between a fire that lights on the first try and one that fails when you need it most. Pair this with the best survival knife guide and the 72-hour emergency kit for a complete preparedness foundation.
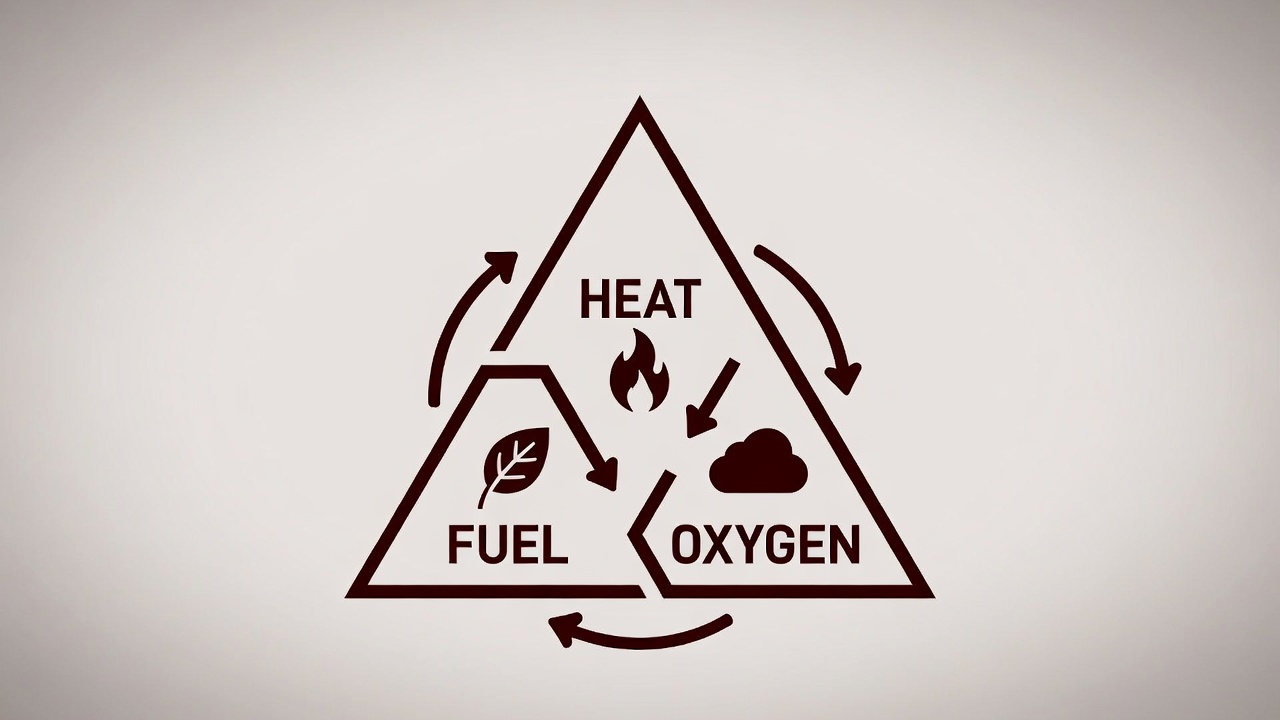
The Fire Triangle: What Every Method Requires
Every fire-starting method works by completing the same three requirements: heat, fuel, and oxygen. Understanding this triangle helps diagnose failures faster than any troubleshooting list can. When a method fails, it’s always one of three reasons: insufficient heat, wet or wrong fuel, or smothered airflow. Keep this framework in mind as you work through each method.
The Three Stages of Fire
Regardless of which ignition method you use, every successful fire-build follows the same progression:
- Tinder: Finely shredded, bone-dry material that ignites from a spark or ember. This is the most critical element — without reliable tinder, no method succeeds consistently.
- Kindling: Small sticks (pencil-width to thumb-width) that catch from the burning tinder and generate enough sustained heat to light larger fuel.
- Fuel: Wrist-to-arm-sized wood that burns long enough to establish a self-sustaining fire.
Never skip stages. The most common failure is moving from tinder to fuel too quickly. Build up slowly through each size increment.


Method 1: Bow Drill — The Most Reliable Friction Method
The bow drill is the most widely taught primitive fire method because it generates sustained friction with mechanical advantage, reducing the physical demand compared to the hand drill while remaining achievable with natural materials. With practice, it works in nearly any condition where reasonably dry wood is available.
Equipment Setup
- Fireboard (hearthboard): A flat, dry piece of softwood — cedar, cottonwood, willow, basswood, or mullein are preferred. Hardwoods like oak are too dense; the friction doesn’t generate enough heat. The board should be roughly 1–2 inches wide, 3/4 inch thick, and flat-bottomed so it doesn’t rock.
- Spindle: A straight, dry hardwood stick approximately 12–18 inches long and 3/4 inch in diameter. The spindle needs to be harder than the fireboard. Dead, dry yucca or mullein stalks are traditional; dry maple or ash work in wooded environments.
- Bow: A curved branch strung with cordage — paracord, rawhide, or braided plant fiber. The bow should be roughly arm’s length. Cordage should be snug but not so tight it binds the spindle.
- Handhold (socket): A smooth, hard piece of wood, stone, or bone that sits on top of the spindle. Lubricate the socket contact point with lip balm, pine pitch, or ear wax to reduce friction at the top while maximizing it at the bottom.
- Catch board: A thin piece of bark or leaf under the fireboard notch to catch the ember dust.
Bow Drill Technique
- Cut a small depression in the fireboard roughly 3/4 inch from the edge. Burn it in by doing a few bow strokes until it’s seasoned (blackened).
- Cut a V-shaped notch from the edge of the board into the depression. The notch should remove about 1/8 of the depression circle. This is where the ember forms.
- Place the catch board under the notch. Position your foot firmly on the fireboard to prevent movement.
- Loop the bowstring around the spindle once. Place the spindle in the fireboard depression, press down with the socket, and begin sawing the bow back and forth with smooth, full-length strokes.
- Maintain consistent downward pressure and smooth cadence. Speed matters less than sustained, even strokes. Increase speed in the final 15–20 seconds as smoke intensifies.
- When a thick column of smoke rises from the notch and continues after you stop, the ember has formed. Gently tap the fireboard to dislodge the ember onto the catch board.
- Transfer the ember to your tinder bundle. Fold the bundle around it gently, blow steadily at the base of the bundle from a few inches away, and increase until it ignites. Add to your kindling immediately.
Bow Drill Troubleshooting
- Smoke but no ember: Notch isn’t reaching the center of the depression, or wood is too hard or too soft. Try a different fireboard.
- Spindle slipping out: Bowstring is too loose or your technique is inconsistent. Keep the bow horizontal and your wrist locked against your shin.
- No smoke at all: Wood is wet or wrong combination. Cedar-on-cedar, cottonwood-on-cottonwood, and willow-on-willow are reliable same-wood combinations.
Method 2: Hand Drill — Simplest Setup, Most Demanding Technique
The hand drill requires no bow or socket — just a spindle and fireboard — but demands significantly more physical effort and technique. It works best in warm, dry climates where the wood moisture content is minimal. In cold or humid environments, the bow drill is more reliable.
Hand Drill Setup
The spindle needs to be longer than the bow drill — 24–36 inches — to give your hands room to descend as you spin. Choose an extremely straight, dry, lightweight stalk: yucca, mullein, cattail, or elderberry are traditional choices. The fireboard requirements are the same as the bow drill.
Hand Drill Technique
Place the spindle in the fireboard depression and roll it rapidly between both palms while applying downward pressure. As your hands descend toward the fireboard, reposition them at the top of the spindle without losing the momentum. The key is maintaining downward pressure and rotational speed simultaneously — something that takes significant practice to coordinate. When smoke billows from the notch, the ember has formed. Transfer it to your tinder bundle as with the bow drill.

Method 3: Flint and Steel — Most Reliable Primitive Ignition
Flint and steel is faster to execute than friction methods once you have the materials, and it works in cold and damp conditions better than bow drill. The limitation is that it requires either carried materials (a steel striker) or a source of natural flint, chert, or quartz.
Materials
- Hard stone: Flint, chert, jasper, quartz, or obsidian — any stone with a high silica content and sharp edges. Strike a piece against metal to test it before committing.
- High-carbon steel: A carbon steel knife back, commercial fire striker, or piece of high-carbon steel file. Stainless steel doesn’t work — it needs to be high-carbon steel that sparks visibly when struck.
- Char cloth: The most effective spark catcher. See preparation instructions below.
Flint and Steel Technique
Hold the char cloth on top of the flint between your thumb and the stone. Strike the steel downward against the sharp edge of the flint with a glancing blow. The goal is to shave off tiny steel particles that oxidize rapidly and land on the char cloth. When a glowing orange spot appears on the char cloth, fold it gently into your tinder bundle and blow to flame.
Char Cloth: The Critical Tinder Upgrade
Char cloth converts flint-and-steel into a reliable system. Without it, you’re trying to ignite raw tinder with a spark — possible, but inconsistent. Char cloth catches a single spark and holds a glowing coal long enough to transfer to a tinder bundle.
Making Char Cloth
- Cut 100% cotton fabric (old T-shirt, denim scraps, or canvas) into 2–3 inch squares. Avoid synthetic fabrics — they melt rather than char.
- Place fabric squares in a small tin container with a tight-fitting lid. A small Altoids tin works perfectly. Punch one small hole (3mm) in the lid to allow gases to escape during charring.
- Place the tin in or over a fire and heat for 5–10 minutes. You’ll see smoke and eventually flames coming from the hole — this is normal. The fabric is pyrolyzing (burning without oxygen).
- When the smoke and flame from the hole stop, remove the tin and let it cool completely before opening. Opening while hot allows oxygen in and the char cloth will ignite.
- Properly made char cloth is uniformly black, lightweight, and fragile — it holds together but crumbles at the edges. A single spark should ignite it immediately.
Store char cloth in a waterproof container. A single tin of char cloth provides dozens of fire-starts and weighs almost nothing. Include it in every bug-out bag and survival kit.

Method 4: Magnifying Glass and Sunlight
A magnifying lens concentrates sunlight into a focused point hot enough to ignite tinder. This is the easiest method to execute successfully — no skill requirement beyond steady hands — but it works only when the sun is high and bright. Overcast skies, low sun angles in morning and evening, and winter light at northern latitudes reduce effectiveness significantly.
Technique
Hold the lens so it creates the smallest possible point of focused light on your tinder. The focal distance varies by lens — experiment to find the tightest point. Keep perfectly still and wait. On a clear summer day, char cloth ignites in 10–30 seconds; dry plant fiber takes 30–90 seconds. Tinder requires preparation: loosely shredded, extremely dry material provides the most surface area for ignition.
Improvised Lenses
A water-filled balloon or clear plastic bag forms a lens that can ignite tinder on a bright day. Fill it with the clearest water available (muddy water reduces effectiveness), shape it into a sphere, and use the same technique as a glass lens. This is an emergency-only technique with variable results depending on water clarity and sun intensity.

Tinder Preparation: The Most Important Element
Every ignition method fails without adequate tinder. Tinder is not the kindling — it’s the material that catches a spark or ember and produces a flame. The qualities of effective tinder are consistent regardless of the source: bone dry, finely shredded, and with maximum surface area.
Best Natural Tinders
- Dry grass: Dead grass shredded finely and formed into a bird’s-nest shape. Must be completely dry — grass that feels soft still contains moisture. Collect from the interior of dead grass clumps protected from ground moisture.
- Birch bark: Birch bark contains oil that burns even when slightly damp. Shred the inner layers of dry birch bark into fine fibers for exceptional tinder. One of the few tinders that works reliably in northern climates.
- Cattail down: The brown cattail seed heads release extremely fine, dry fibers that catch sparks readily. Gather from heads that have begun to open. Dry cattail down is among the best natural tinders available.
- Pine pitch: The hardened resin at wound sites on pine trees ignites readily and burns hot. Use it to supplement damp tinder rather than alone — it burns fast and intensely.
- Dry wood shavings: Fine shavings from the interior of dry wood using a knife. The exterior of any stick collects moisture from the air — the interior is dry even when the outside is not. Shave aggressively to produce a fine, fluffy pile.
- Dry fungi: Horse hoof fungus (Fomes fomentarius, also called amadou) is historically the most important fire tinder in northern climates. The inner layer catches an ember with minimal preparation and holds a coal longer than most plant tinders.
Tinder in Wet Conditions
In rain, the same tinders work — but you need to find them in protected locations. Dry tinder is always present inside dead logs, under dense brush where rain doesn’t penetrate, and in the dry interior of larger sticks. A folded piece of birch bark forms a waterproof cover over your tinder bundle. In extended wet conditions, carrying pre-prepared char cloth eliminates the tinder challenge entirely — it ignites from a spark regardless of ambient humidity.
Kindling and Fuel Progression
Once your tinder is burning, the fire needs to grow through a controlled progression. Rushing this step is the single most common cause of fire failure after successful ignition.
The Progression
- Stage 1 — Tinder flame: Small, brief, requires feeding immediately.
- Stage 2 — Fine kindling (toothpick to pencil size): Add a loose teepee or bundle over the tinder flame. Blow gently from the base. Do not smother — leave air gaps.
- Stage 3 — Medium kindling (pencil to thumb): Add when Stage 2 is burning confidently. Same loose teepee structure.
- Stage 4 — Fuel (wrist to arm): Add when you have a sustained bed of coals from Stage 3. At this point, the fire is self-sustaining.
Collect all fuel before starting the fire. Leaving a fragile tinder flame to gather kindling is a common mistake. Have everything staged in size order before striking your first spark.
Frequently Asked Questions About Starting a Fire Without Matches
What’s the easiest method to start a fire without matches?
For someone with minimal practice, a magnifying glass on a sunny day requires no skill beyond steady hands and dry tinder. For reliable emergency use regardless of conditions, flint and steel with pre-made char cloth is the easiest method — once you’ve practiced the striking motion, ignition takes seconds. The bow drill is more broadly applicable (no gear needed beyond wood), but requires the most practice before it becomes reliable under stress.
How do I prepare char cloth for fire starting?
Cut 100% cotton fabric into 2–3 inch squares and place them in a small metal tin with a tight lid, punctured with one small hole. Heat the tin over a fire for 5–10 minutes until smoke from the hole stops. Let the tin cool completely before opening. The result is uniformly black, fragile fabric that catches a single spark and holds a glowing ember long enough to transfer to a tinder bundle. Store in a waterproof container. One prepared tin provides dozens of fire-starts.
What’s the best tinder to use in wet conditions?
Char cloth is the most reliable wet-condition tinder — ambient humidity doesn’t affect its ability to catch a spark. For natural tinders in wet weather, the interior of dead logs and sticks is always dry even when surfaces are wet. Birch bark contains oils that allow it to burn even when damp. Pine pitch (hardened resin from wound sites on pines) ignites readily in any condition. Collect and dry natural tinders before you need them, and carry char cloth in every kit as backup.
Published by Chad Dyer, President, Brand Avalanche Media, Inc. Popular Outdoorsman is an independent editorial publication. Product recommendations reflect editorial judgment based on field experience and specifications review.


Reader Favorites
Field-to-table reference desk
From tag to table — official season dates for all 50 states, plus safe doneness temps for your harvest.
| Species | Archery | Firearm |
|---|---|---|
| Deer | Sep–Oct | Nov |
| Elk | Sep | Oct–Nov |
| Turkey | — | Apr–May |
All 50 state wildlife agencies, plus how seasons, tags and licenses work.
Find your state → Network| Doneness | Target |
|---|---|
| Rare | 125–130°F |
| Medium-rare | 130–135°F |
| Well-done | 160°F+ |
Safe pull temps for venison and steak, from Popular BBQ.
View full chart →